](/media/header/drawings_space.jpg)
What is SmartGit?
SmartGit is a graphical interface for using Git services on your local computer. The programm exists since 2009 and has always been developed further, which ensures smooth functioning. But what use is SmartGit to you in connection with LIFOS?
Why you should use SmartGit ?
SmartGit allows you to have a “repository” locally on your computer and track changes made to it. This repository can be connected to your project on LIFOS. This means that if a change is made online on LIFOS, you can also incorporate it into your local folder. At the same time, you can work locally on your computer and quickly and transparently load changes into LIFOS. This makes everything much more comprehensible, especially when working on a group project. You will learn how to install and use SmartGit on your computer in the following sections.
Setup
To use SmartGit on your computer, you first need to download the program. You can do this for various operating systems by clicking here. The website also provides installation instructions for different operating systems.
After the first start of SmartGit, you will be asked to configure some settings in the setup menu. In older versions, you could select a License type where you could indicate that you are using SmartGit for non-commercial purposes. Unfortunately, this is no longer possible in newer versions of SmartGit, and the window looks like this:
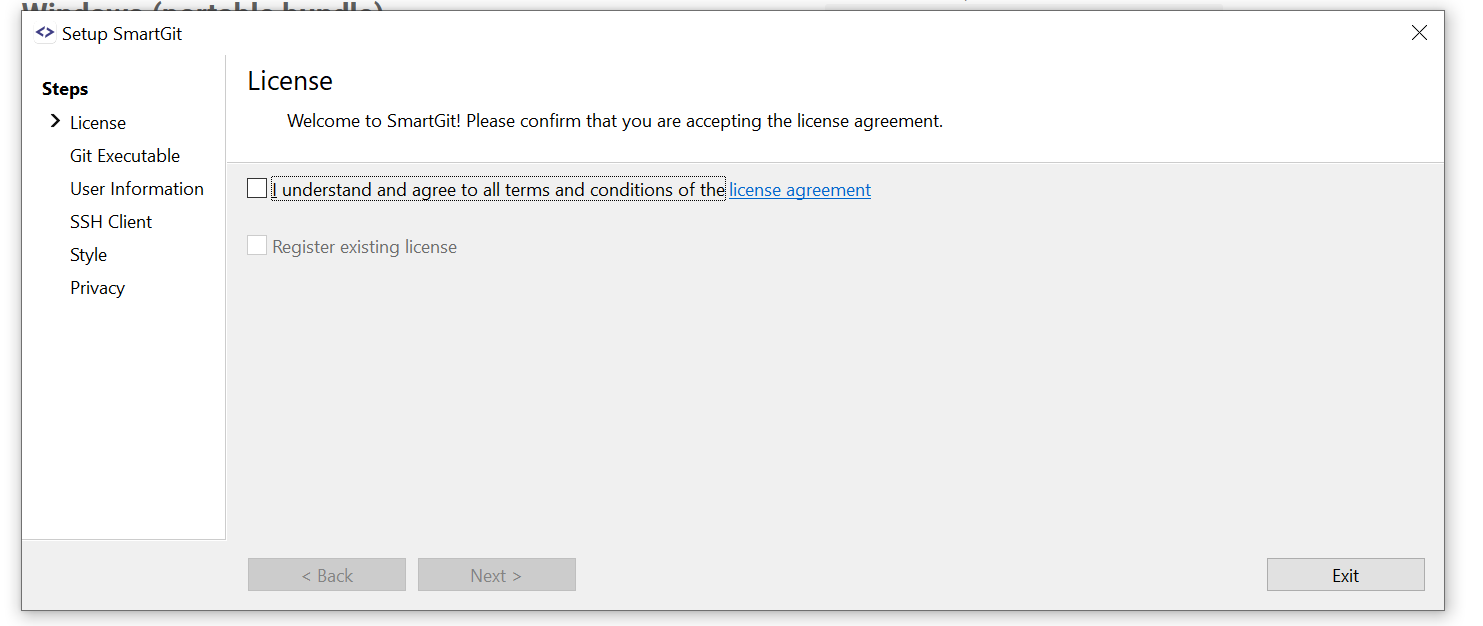
The first month after installation offers free use without any requirements You can apply for an educational license here by simply providing your name and student email address. After confirming your email address, you will have to wait a few days. However, since we have a one-month free trial, we can still proceed with the further installation and use of SmartGit. Later on, you will receive an email with your educational license, which will provide all necessary steps for activation.
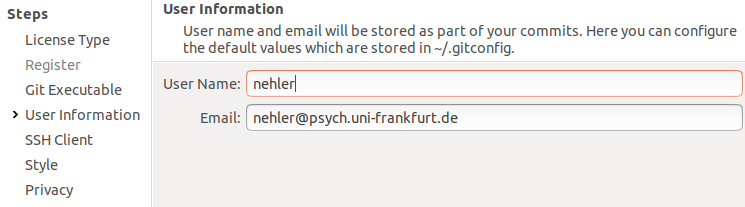
Next, under User Information, you need to give yourself a username and provide an email address through which you can configure your SmartGit. For simplicity, you can use the same username and email that are used for LIFOS.
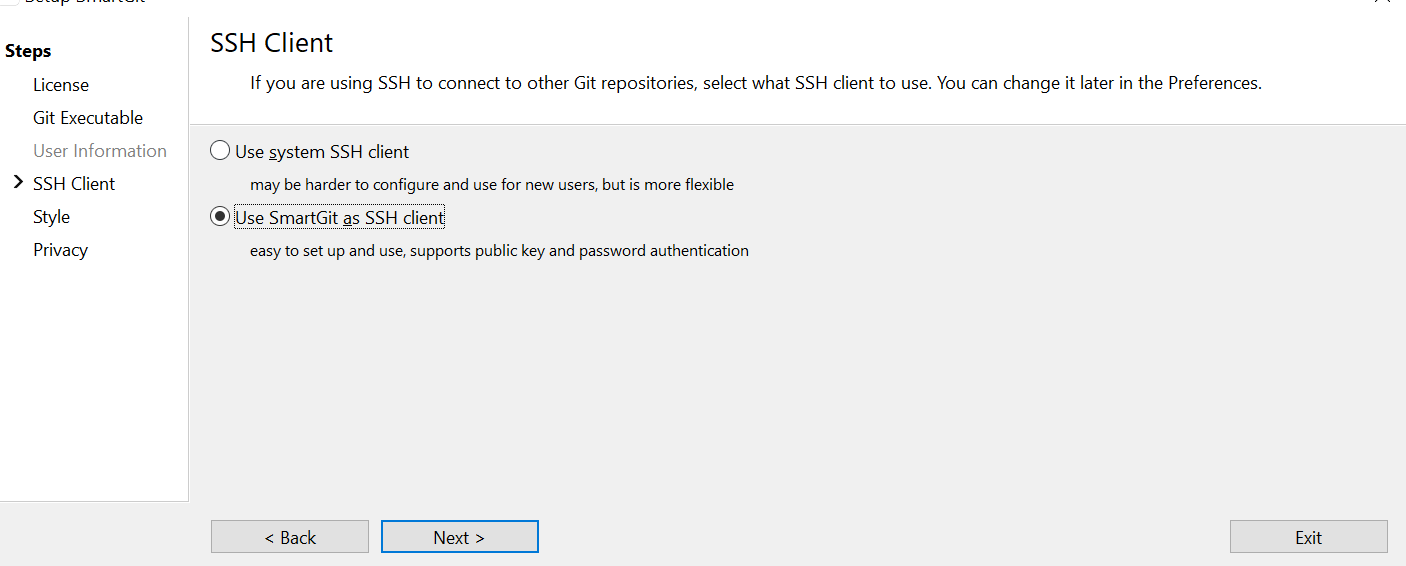
Now you need to select the option Use SmartGit as SSH client. This is recommended when starting to work with SmartGit.
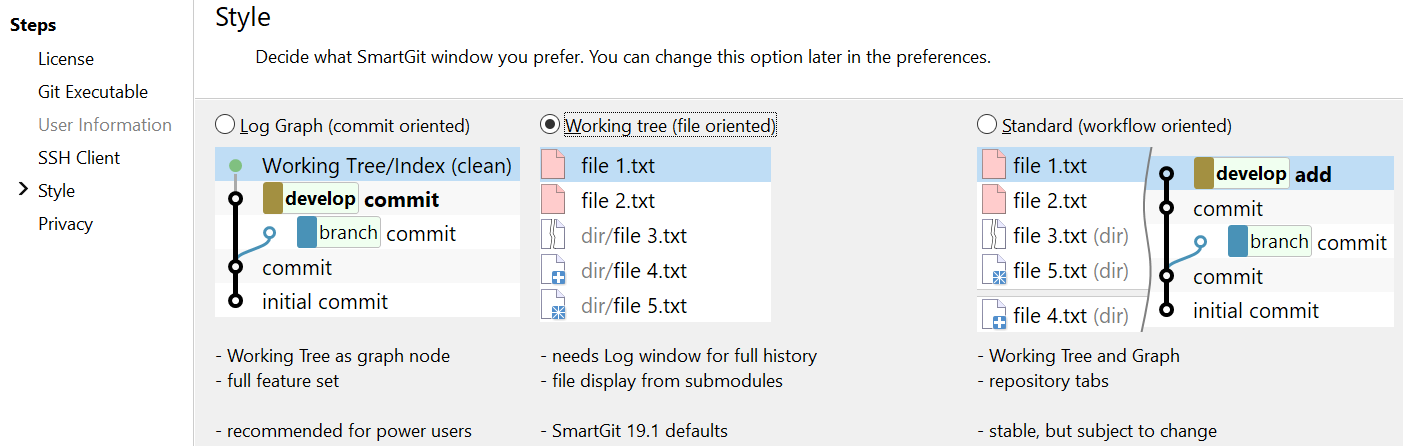
Next, we will be asked about the preferred style of the SmartGit interface. There is no right or wrong answer here, and there is no direct recommendation for beginners. However, we estimate that the Working Tree view is more intuitive and therefore we recommend using it. As described in the window, this setting can be changed later under Preferences.
Under Privacy, you can choose when to send data to the creators to improve the program. We do not make any specific recommendations here, as it is a matter of personal preference. Additionally, SmartGit searches for initialized repositories on the computer and displays the number in this window.

The installation is now complete.
Connect LIFOS and SmartGit
We assume that you have already created your project on LIFOS. We will now establish a connection between your online project and your local computer.
For starters, you should go to the site of your current project, where you should now see two warnings at the top:

Only the lower warning is of interest to us right now. Click on set a password. You should get redirected to a page to create a new password. This password will be used to connect SmartGit with your project. It is not used to log in on Gitlab itself, you will still need to use your HRZ-login credentials for that. If you accidentally chose to never show the warning again, you can instead use this link.
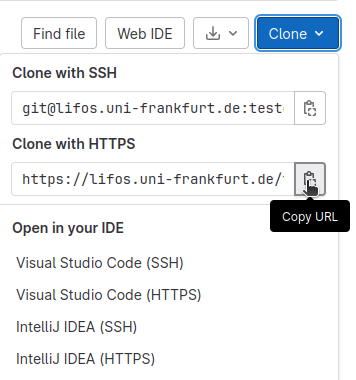
Now, we need your username, password, and the HTTPS link to your project. The password has just been created by you. You can find the link by going to your project, clicking on Clone, and then copying the link under Clone with HTTPS.
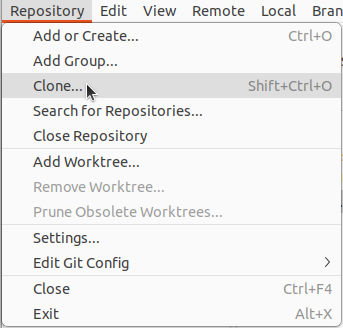
Now we switch to SmartGit again. Here we click on Clone under Repository.
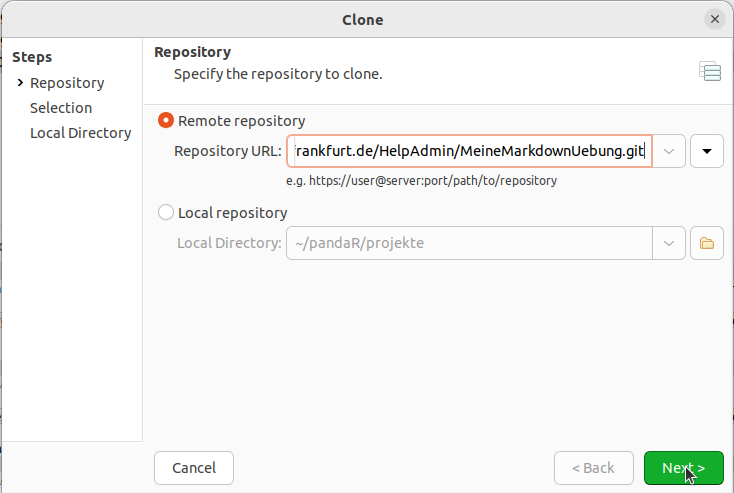
Insert the link, you have copied, under “Repository URL” and then click Next.
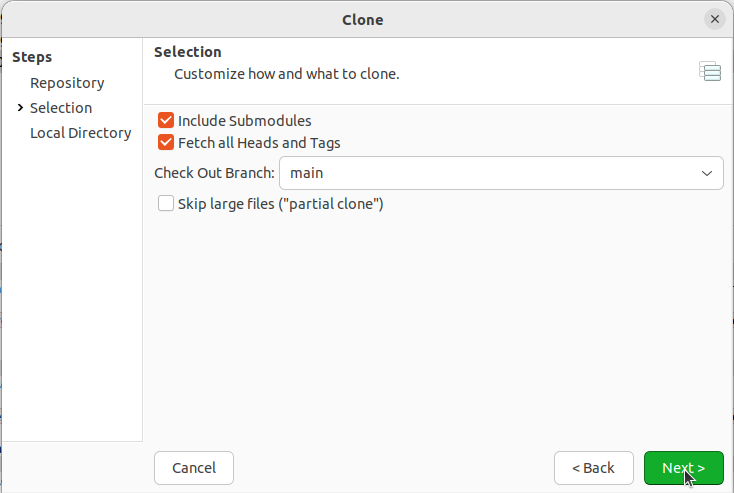
On the last page, we need to initiate a local folder that serves as a local representation of the online repository.
Lastly, we need to enter the LIFOS username and password.
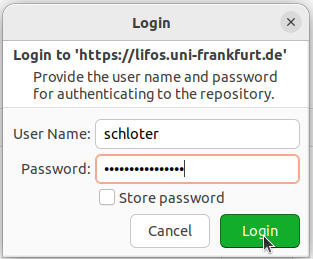
Now, we have successfully connected a remote repository with your local SmartGit!
To confirm whether the connection was successful, you can check for the absence of error messages and the appearance of a new repository in SmartGit.

Basics
After successfully installing SmartGit and connecting it to LIFOS, it’s now time to start using it. However, you need to know the most important terms:
“Commit”: You can make a commit whenever you have made a change to a file and want to keep that change, meaning you are sure you want to adopt that change everywhere. Commits allow you to track changes to the file.
“Pull” and “Push”: Once you have made a commit, you need to transfer it to your non-local repository. This is done with “push” - you “push” the changes from your local directory to the corresponding online directory. With a “pull,” you retrieve all changes that may have been made (including by people working on your project) to your local directory. It is important to always perform a pull before starting to work, as otherwise there may be complications.
You can also learn more about Git and all the related commands and actions in this tutorial, though it is only available in german.
User Interface
Let’s take a closer look at the user interface of SmartGit, which we have set up by selecting a specific style.

At the top of the screen, we see icons for the pull and commit actions, which we will need shortly. On the left side, we see our repository - in theory, you can have as many repositories as you are involved in projects. If you have followed this tutorial step by step, your LIFOS project repository should appear here. Below that, we see the different branches of a project - you can read about those here.
In the middle of the screen, we see the Files pane. This pane displays all the files that haven’t been tracked yet, have been modified, deleted, or renamed.
In the Changes pane, the changes made to a file are displayed when it is selected under Files. In the Journal pane, all the commits from the history are listed.
To simulate working with SmartGit, we need to make changes to the files in our folder or create new ones. First, we open our tracked folder. Depending on the template, different files may already appear here, which were cloned locally to your computer.
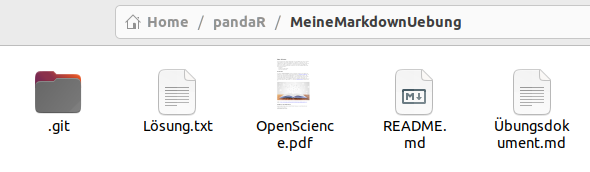
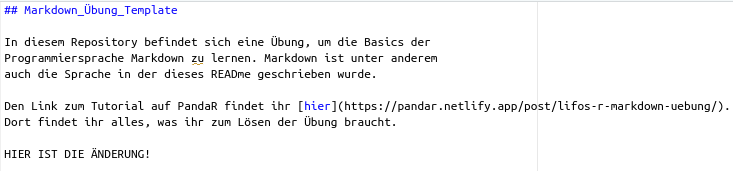
We will now make a change in the file “README.md” since it is included in every template. You can simply add a sentence to the file for demonstration purposes and then save it.

Commit
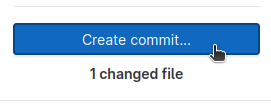
Now that we have made a change (or added) a file, we want to commit this change. To do this, we select all the files in the Files pane with a left-click that should be included in the next commit (hold down Ctrl to select multiple files). Then, we select commit from the toolbar.`

The commit window opens, showing which files we have selected. We also need to add a suitable message to our commit, such as “Update README”.
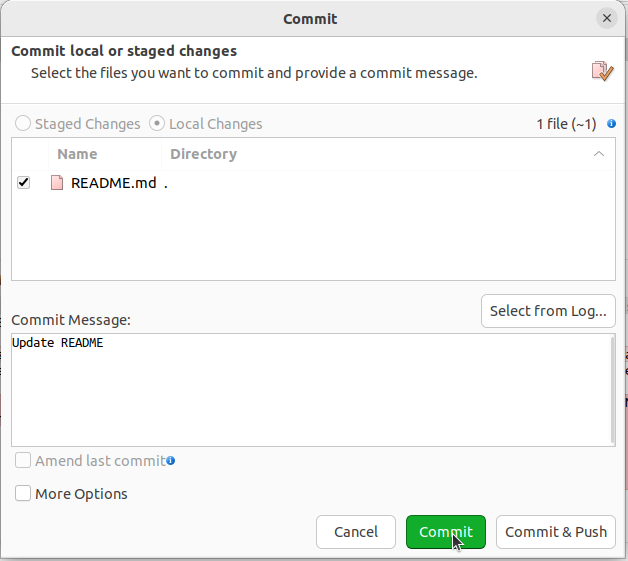
Once the message is written, click Commit and the changes are accepted. They are now tracked locally. Alternatively, we could also click Commit & Push here, which would push our local folder directly to LIFOS. This can be done if we are confident in our changes. Only commit is recommended if we are unsure and want to continue working on the changes - or if we want to make further changes to other files in our project. For demonstration purposes, we click on Commit. If you look at the Journal pane in SmartGit, this commit is included in main, but not in origin. This indicates that the change still needs to be initiated in the remote repository. We can do this with a push.
Push & Pull
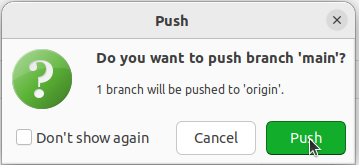
A simple click on Push is enough to track the project online. First, a window opens in which we confirm this action once again.
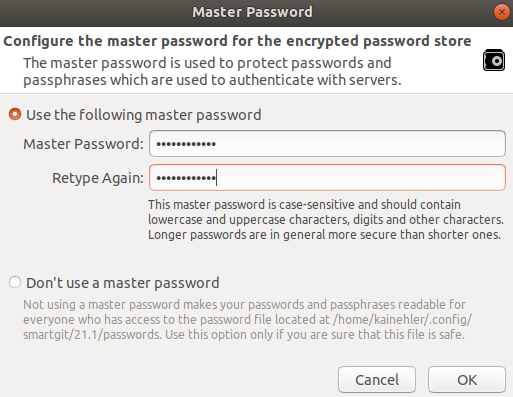
Depending on the version of SmartGit and operating system, we may now be asked for a Master Password. While it is possible to skip this step, it is important for protecting files when interacting with servers and is also practical (especially if we use GitLab as well as GitHub or similar platforms). Therefore, we strongly recommend setting a master password. When interacting with LIFOS, this will simply mean that you will also be prompted for the master password working locally in SmartGit. It is best to use a different password than the one you use for the LIFOS server.
You have to confirm the legitimacy of access to the server once with your LIFOS login.<!–Hier gibt es nun zwei Möglichkeiten. Entweder ihr generiert einen Personal Access Token (PAT), wie man das machen kann, könnt ihr im Tutorial zu GitHub nachlesen. Das ist vor allem praktisch, wenn ihr die Verbindung zum LIFOS-Server an unterschiedlichen Geräten benutzt. Oder ihr generiert einen Application Programming Interface (API) Token, der mehr Sinn macht, wenn ihr mehrere Provider habt, von denen ihr aus SmartGit aus zugreifen wollt.
Application Programming Interface
Damit wir nicht jedes Mal unseren PAT eingeben müssen, aktivieren wir den Zugang über das Master Password. Dafür wählen wir in der obersten Zeile Edit aus und wählen darin Preferences aus.

Hier gehen wir in der Auswahl auf Hosting Providers und drücken dann rechts auf Add.

Hier muss GitLab ausgewählt werden, da LIFOS darauf basiert. Wir wollen nun einen Token erstellen. Dafür müssen wir den Button Generate drücken. Der Browser sollte sich automatisch öffnen und einen Login zu GitHub erfordern. Sobald wir diese Informationen eingegeben haben, wird ein Token generiert. Diesen kopieren wir dann in das entsprechende Fenster in SmartGit und klicken auf Authenticate.

Wir gelangen zurück in das Fenster, wo wir den Token erstellt haben, und klicken auf Add. Damit erscheint nun im Fenster der Hosting Providers unser GitHub-Account und wir können auf OK klicken.

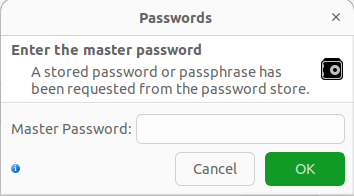
After thatSmartGit asks for the master password, you set earlier, again.
commit.Note that the push process was really simple with just a click of a button. We only had to make the password settings once. Updating our local copy of the repository to match the version on LIFOS is also similarly easy. We can use the button in the toolbar for this too. After clicking on Pull, a window will appear where you can choose between Rebase and Merge - both of these terms are still unknown to us, so we will stick to the default setting. The Pull window will then appear. This window displays the URL of the LIFOS repository - it should be correct, but feel free to check it. Then we click on the familiar pull command.

For a brief moment, a green box appears indicating that the pull was successful. Of course, no changes to files or anything else have just been made, since the local and remote states were identical. We simulate a change made by another person to a file by making a modification in the online version, that is, on LIFOS. To do this, we open the repository on LIFOS and make a change to the “README” file here as well. For example, we simply delete the sentence we just added.
To do this, we open the file in the “WebIDE” and delete the sentence.

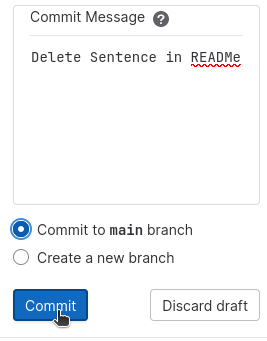
Then we click on Commit.
In the commit message, we briefly describe the change made and select “Commit to main branch”. Then we click Commit and switch back to our SmartGit application.
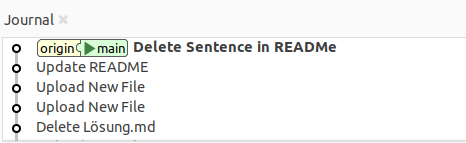
Now we select Pull in our project repository. At first, it may seem like nothing much is happening compared to the previous pull. However, if you look closely, you will see that the latest commit is now displayed at the bottom of the screen in the Journal.
If you look at the “README.md2 file locally on your own computer, the new content will now also be displayed.
Change of Interface Style
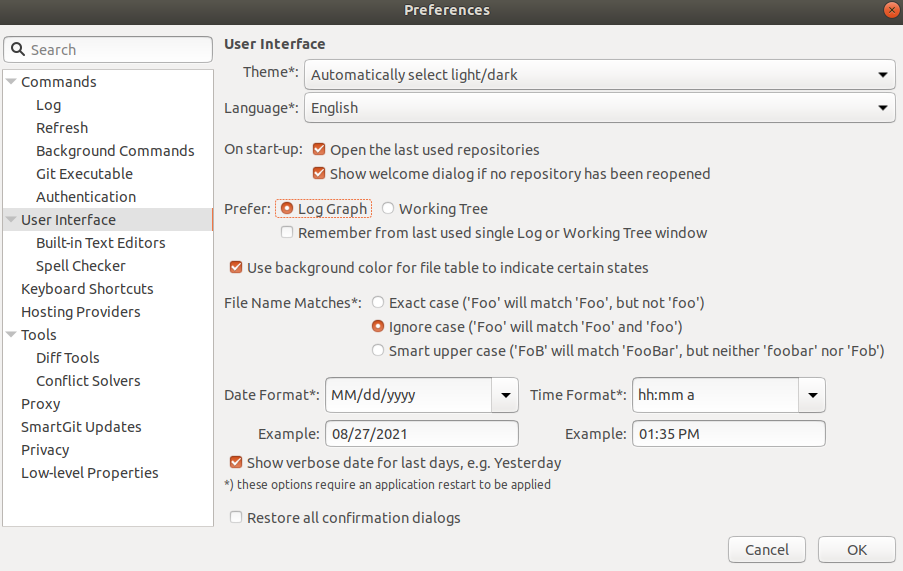
When setting up SmartGit, we chose a style for displaying our repositories. To conclude the basics of the tutorial, let’s take a brief look at how we can change this initial decision. To do this, first select Edit in the top row, then select Preferences. A window will open, where we first click on User Interface in the left overview. In the right window, there is the selection Prefer, where Working Tree should currently be selected. Instead, we now click on Log Graph and confirm the selection (of course, further changes to the interface can be made here, but we will not examine them in detail).
When creating the tutorial, SmartGit had to be closed and reopened once for the changes to become visible. A new layout is visible in the interface, with the display of Repositories and Branches remaining on the left side.
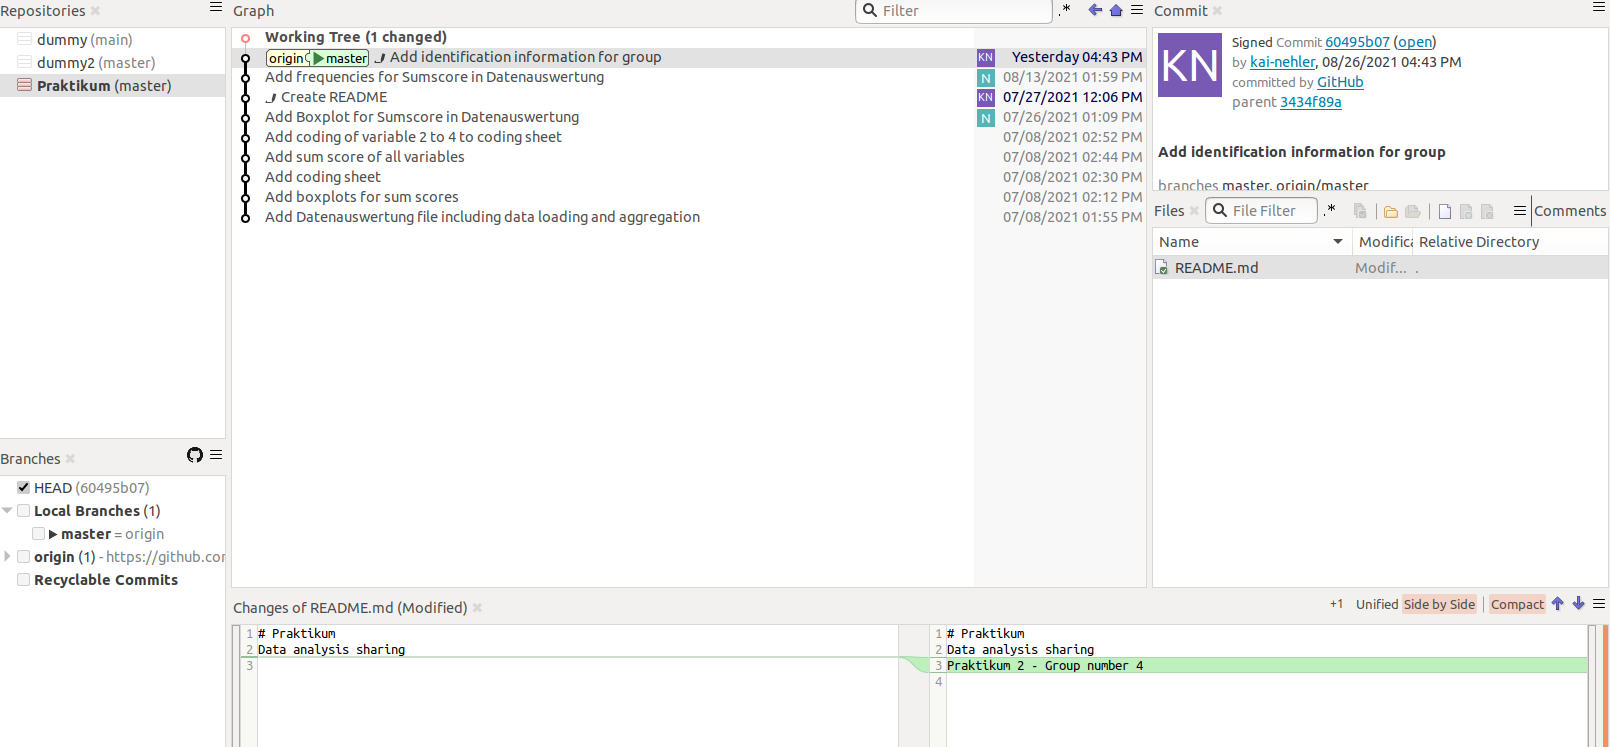
In the central window Graph, the workflow - that is, all commits that have ever been made to our project - is displayed. The initials of the person who made the commit and the date of the change are shown for each one. This allows us to see at a glance who changed what in our project and when. Note that the current state of your repository is now displayed at the top as the Working Tree. A change is shown in this, as the file “.Rhistory” still exists in the repository but has not yet been included in a commit.
On the right side of the screen, we see an overview of all the files we have locally changed since the last commit in the center - in this case, the .Rhistory. Information about the account that made a commit is given in the top right corner. At the bottom of the screen, there is again an overview of changes in files from one commit to another. If you prefer this overview, you can leave the setting as it is. For the rest of the tutorial, we will change the setting back to Preferences and restart SmartGit.
Conclusion and Outlook
SmartGit greatly facilitates collaboration on a project and offers a well-designed user interface. We have learned some additional commands that enable us to work effectively on shared projects. If you are interested in learning more about SmartGit and Git and can understand some german, you can check out the other tutorials on these topics on pandaR.